
Unfortunately, two main qualities for our fireplace resulted in it fondly acquiring the title of the "black hole" of the house since our move-in.
(1) The builder's choice of the "riptide tile" effect: Continuing the floor tiles up the wall stripped this gem of any real design benefits.
(2) The floating fire hole: maybe it is a Texas thing, but growing up in New York a real fireplace needs a decent hearth. This element particularly solidified the space's nickname.
 Over Labor Day weekend, we decided to finally tackle this project! We are by no means do-it-yourself experts. But, with the help of advice from a friendly local fireplace company and a little bit of internet research, we did pretty darn well with the remodel!
Tony and I enjoyed designing the project together. We chose Desert Quartz Ledgestone as the stonework, which reminds us of the local stone in San Antonio. The slabs came in pre-glued panels that made installation easy. Tony became quite the expert with a table tile wet saw, and by the end was even cutting tiny custom pieces to fill around the key insert!
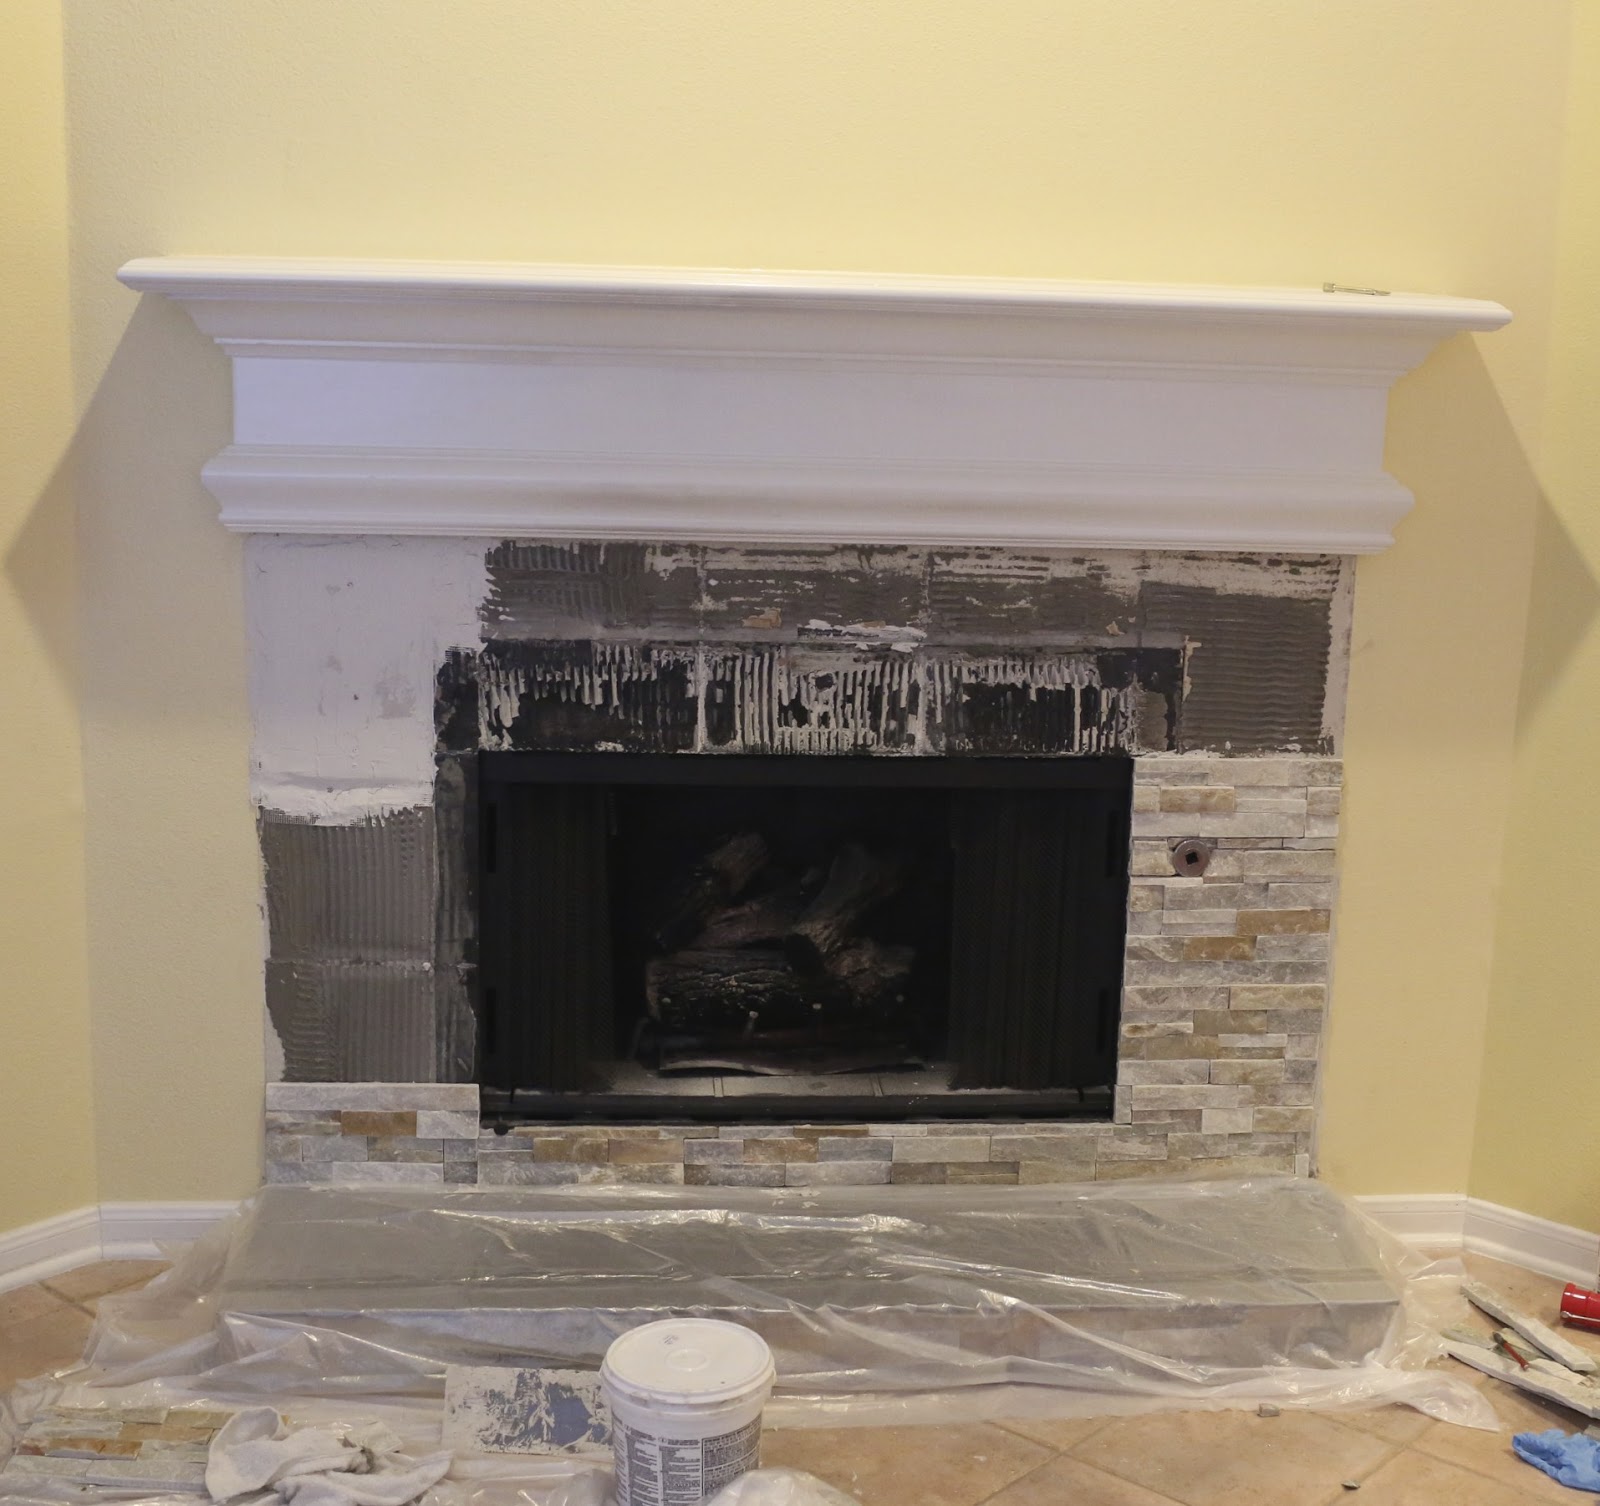
Tile mastic served easy to use and kept the tiles sturdily stuck to the wall. The hearth served to be more of a design challenge. Most of the internet instruction sites utilize preexisting brick hearths in the reface process. We had to build our own using cinderblocks and Quikcrete. Mitte Gray tiles, gray grout, and surrounding ledgestone completed the custom hearth.


Leon was a great little helper along the way. Although he spent a large portion of the time sampling every Mickey Mouse show on Netflix, he did help carry some of the stones and watching Daddy through the window as he cut the stones. He particularly liked modeling in the before pictures saying "Leon cheese."


Despite our planning, there were a few bumps in the road.
We didn't expect the demolition for the tiles to result in ripping off large chunks of the drywall. That obstacle was met with a late-night trip to Home Depot. But, I taught Tony (through my excellent internet search skills) how to successfully replace sections of drywall. That may come in handy in the future for occasional drywall accidents that come with having children.


When we reached the top portion of the fireplace, I had not accounted for the effects of gravity. Luckily, our friend Erik was visiting that day and provided an extra set of hands! We improvised in support structuring by using a piece of leftover drywall to support the center.

After letting the area set for a week, we ended up with this masterpiece!

Although Tony initially placed this project on the "Hire-Out" list, I am happy that I could persuade him to make this project our own... even with a few hiccups along the way.
No comments:
Post a Comment